Note: JetBackup 5 can only be accessed from cPanel. If you are a reseller user, you can access cPanel from WHM. How do I log in to cPanel?
For full instructions, see the official JetBackup Restore & Download documentation.
If your website is experiencing issues but was functioning correctly in the past, you can use JetBackup 5 in cPanel to bring the site to its working state. This guide will show you how to restore both.
Restore website application files
We recommend attempting to restore the application files first, as this is generally the most effective approach and is less likely to reverse content modifications on certain websites.
1. Find where the website files are stored
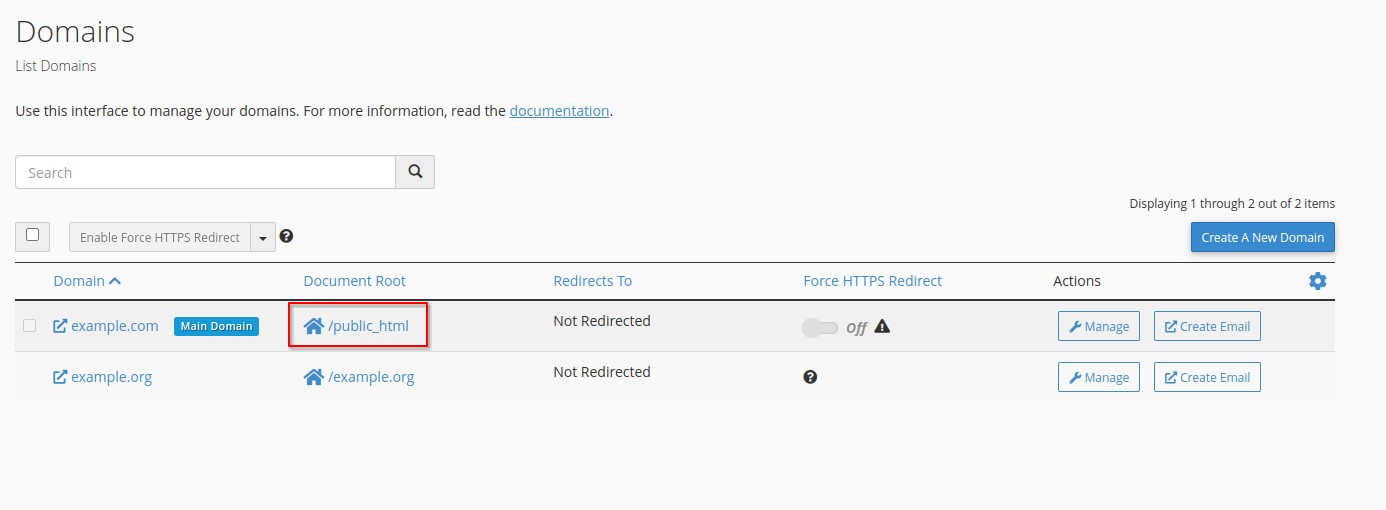
After logging in to cPanel, select Domains under the Domains header in Tools (or use the search in the top-right). You will now see a list of your domains.

Make a note of the value in the Document Root column as this is what you will need to select in JetBackup.
2. Initiate the directory restore in JetBackup
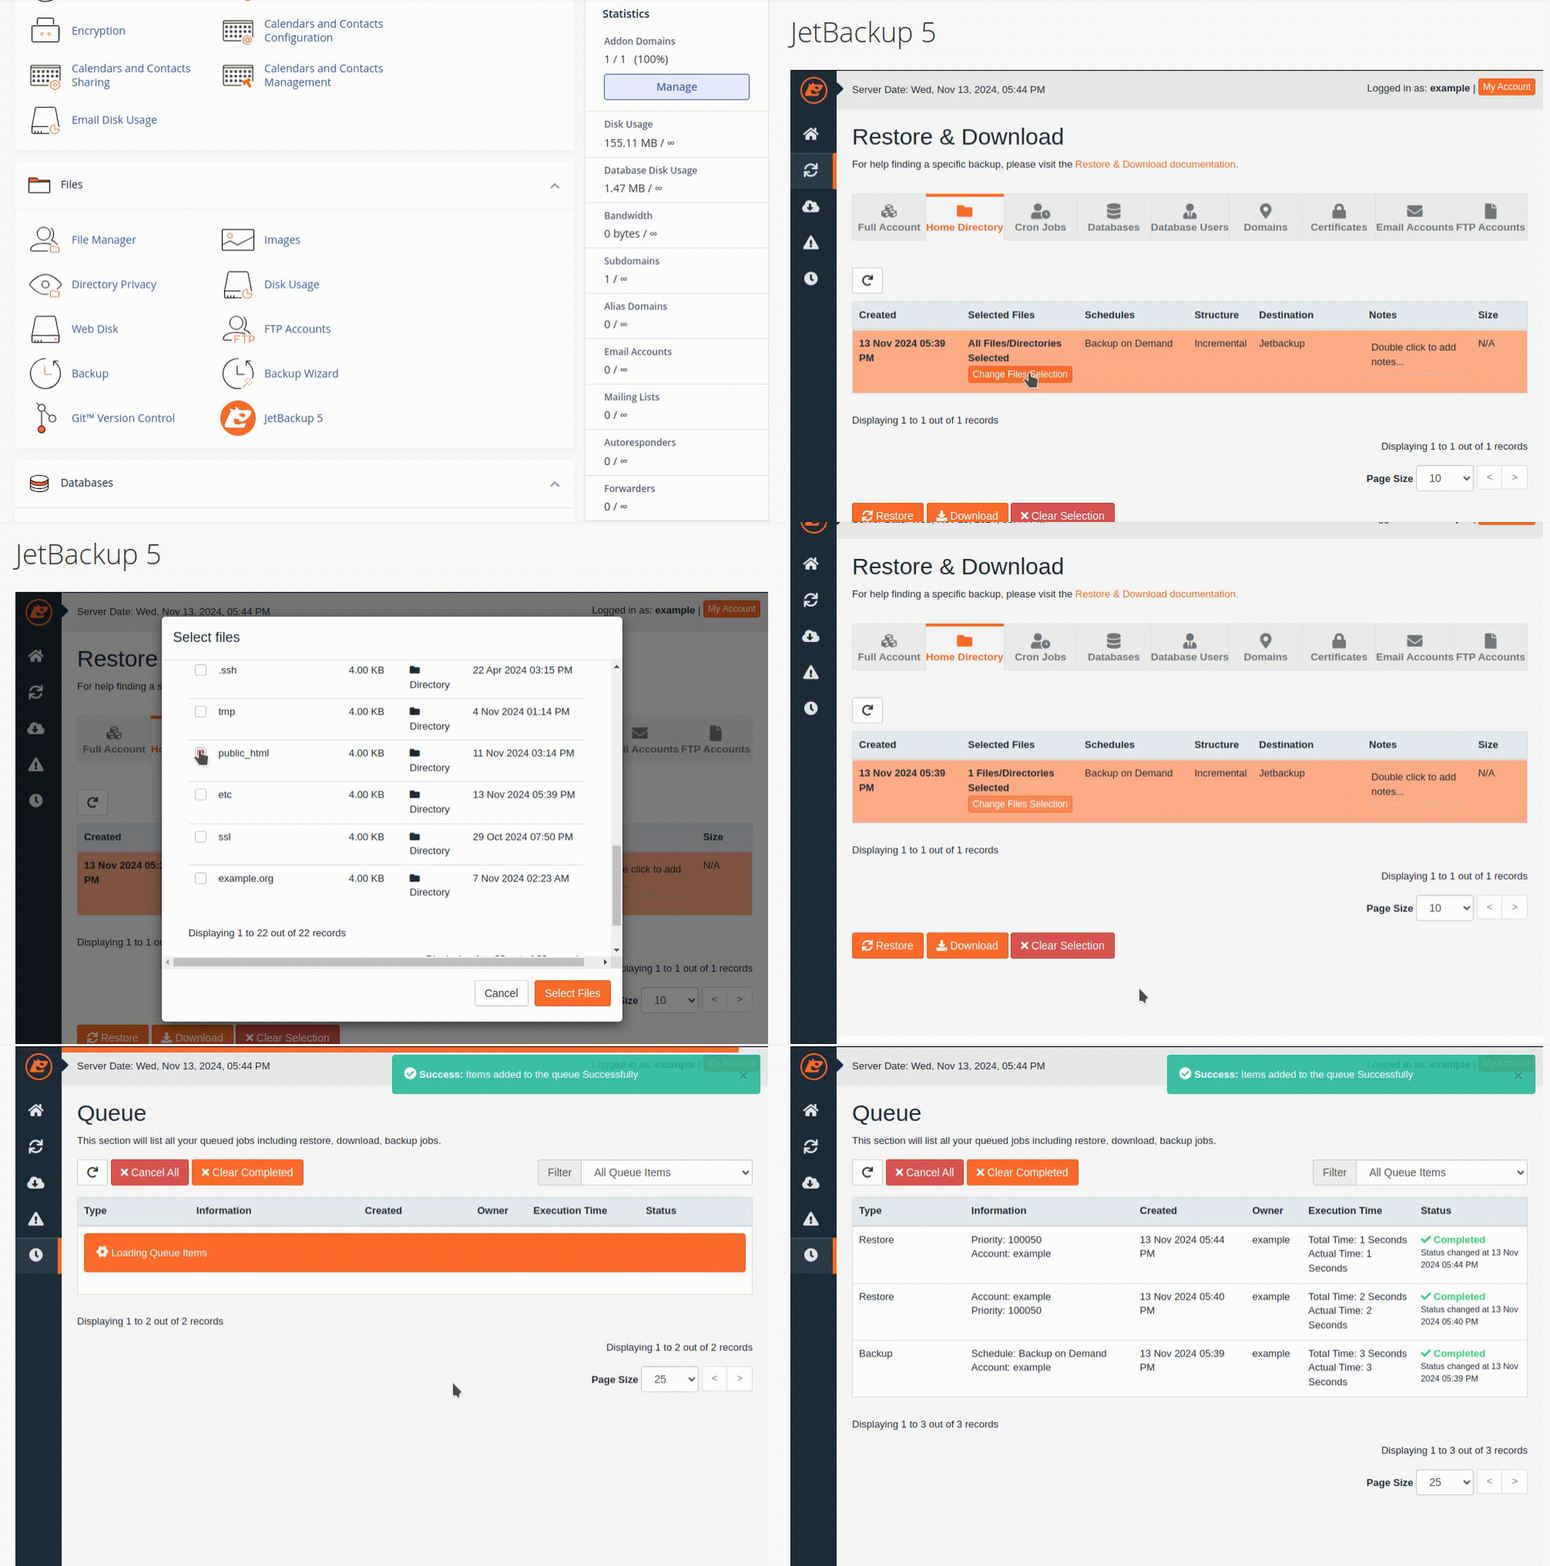
Select JetBackup 5 from Tools in cPanel. Select Home Directory in JetBackup. Now, click on the backup you would like to restore from in the list then click on the button "Change File Selection".
In the menu that appears, scroll down to find the folder with the same name or path as the Document Root you have noted from the previous step (you can ignore the "www -> public_html" listing at the top). This will restore the entire website and remove any changes since the last backup. Click on the check box next to the folder and click "Select Files".
Now, click "Restore". This usually takes a few minutes.

You can check the progress under "Queue" in JetBackup 5.
Restore database
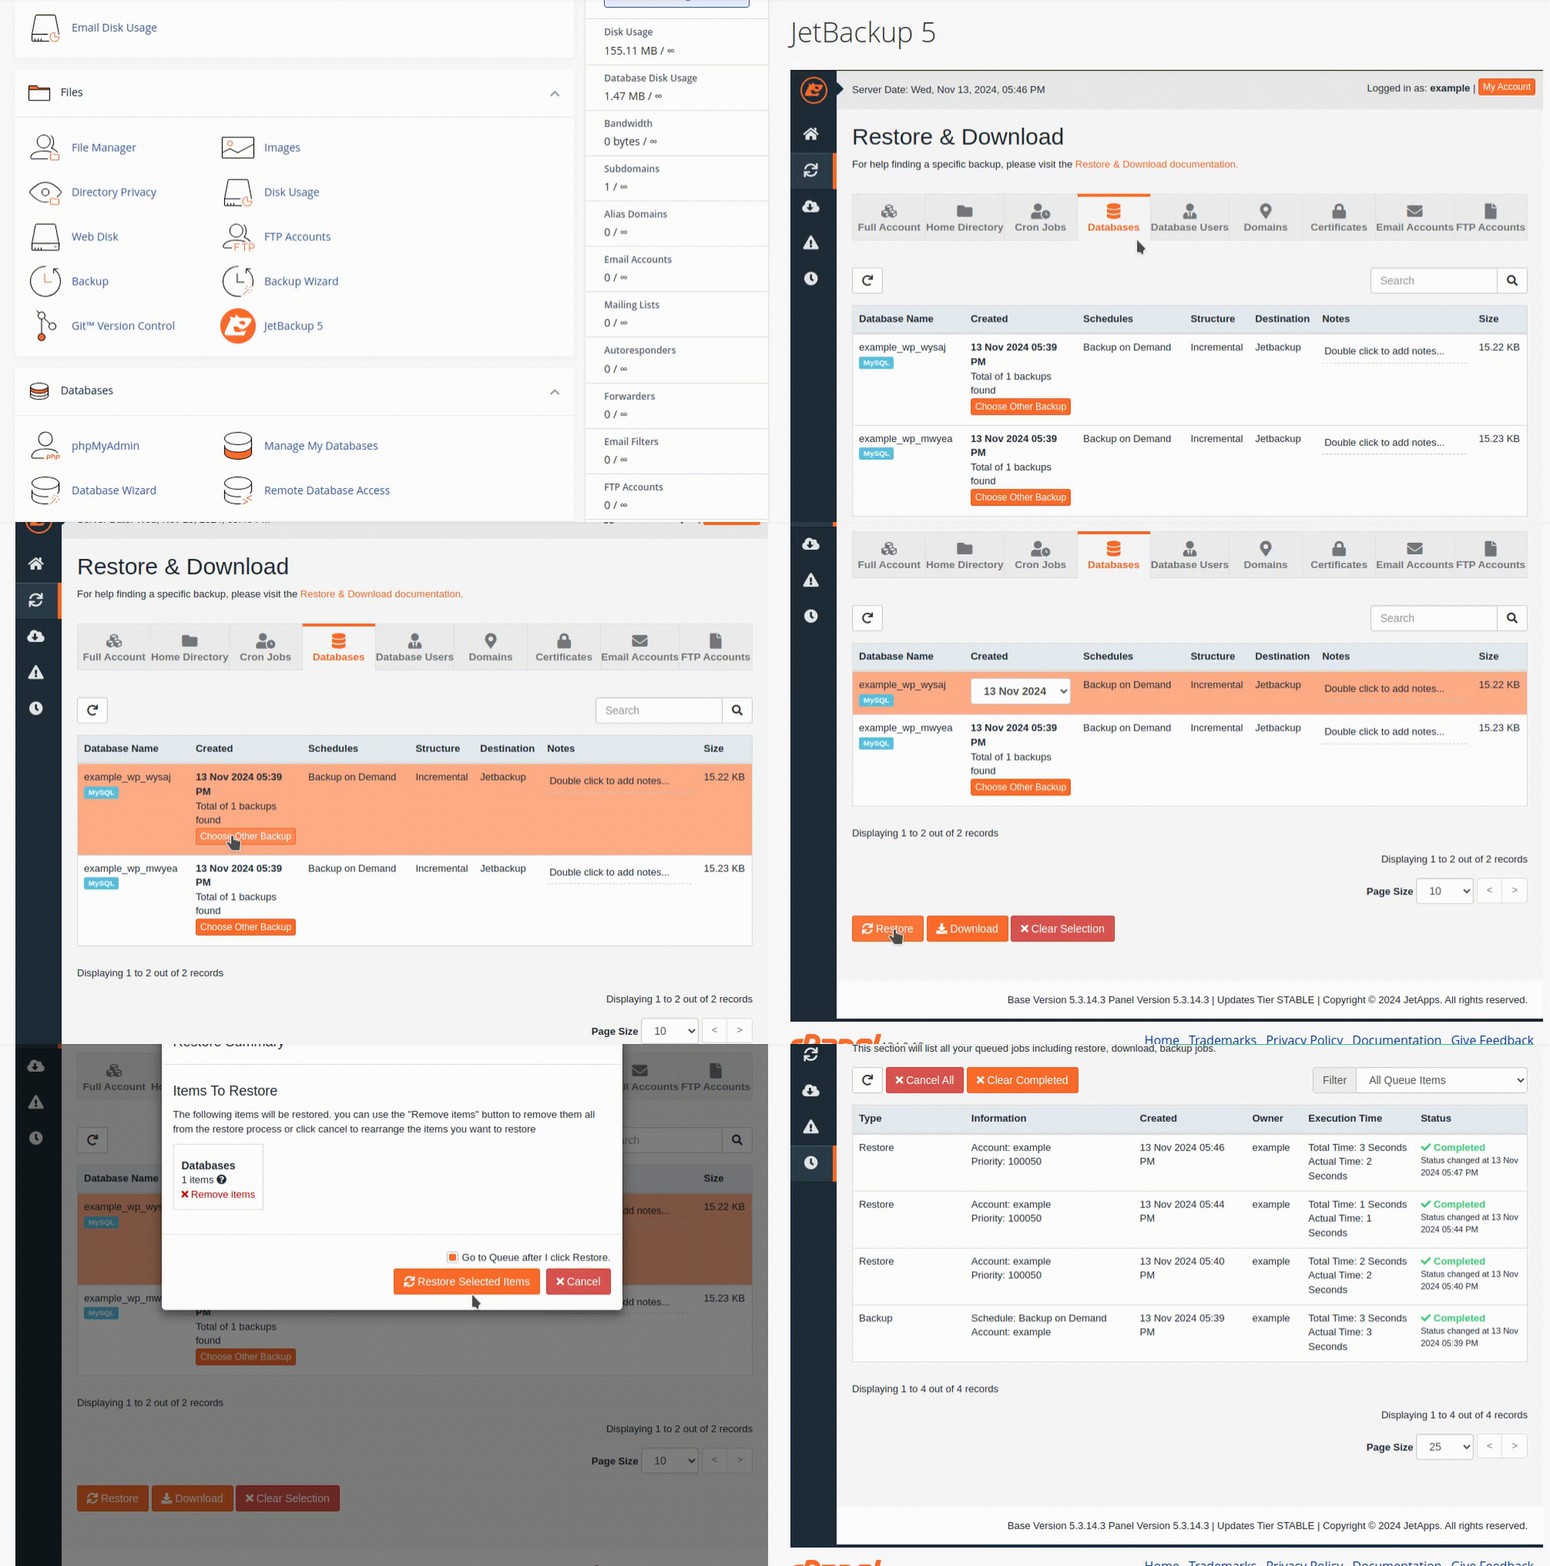
If you’re still having issues after restoring the website’s files, the database could be the cause. If you would like to restore the database as well, this can also be done from the Databases tab in JetBackup 5.
If you have multiple sites, you’ll likely have a few databases to choose from. If you’re not sure which database is used by each site, you can check the name of each site’s database in a couple of ways.
-
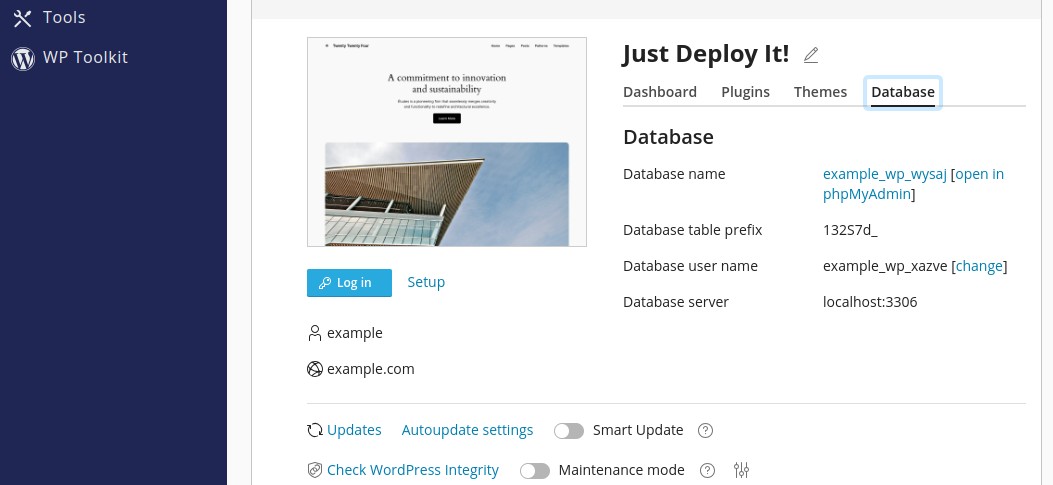
WordPress toolkit
This is the easier method, to do this head to the WordPress Toolkit module in cPanel. You’ll then see the website database details in the "Database" tab:

-
wp-config.php
This process is a little more involved as it will require using the file manager module in cPanel. The database details will be set in your “wp-config.php” file in the document root found earlier. Click on the file and then click “View” from the toolbar. Note down the database name from the line that looks like: "define( 'DB_NAME', 'mydatabase' )". If you’re not sure how to access this file, you can check out our Basic WordPress Troubleshooting guide.
Now, select JetBackup 5 from Tools in cPanel. Click "Databases" and select the database you have found. Click "Choose Other Backup" to select a date before pressing "Restore".

