This guide explains how to generate and install a self-signed SSL certificate on a cPanel account.
A self-signed SSL certificate is primarily used for testing or development purposes. It secures your site with HTTPS, but visitors will receive a browser warning because the certificate is not issued by a trusted Certificate Authority.
Steps to Install a Self-Signed SSL Certificate
1. Log in to cPanel
Use your cPanel credentials to access the control panel.
2. Open the SSL/TLS Tool
In the SECURITY section of cPanel, click SSL/TLS.

-
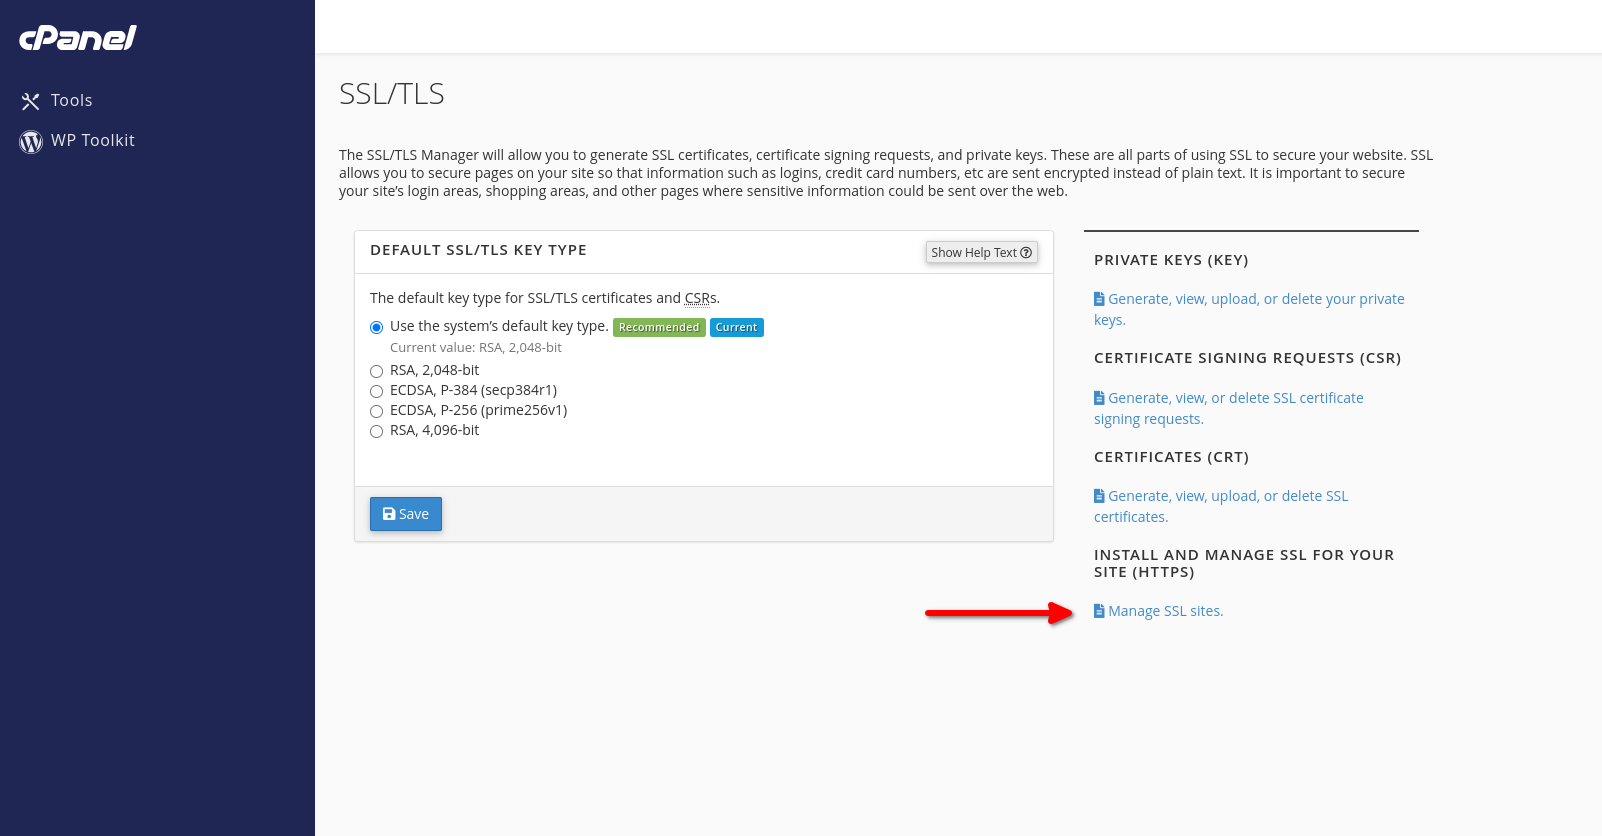
You’ll see options to manage private keys, certificates, and SSL installations.
3. Generate a Private Key
-
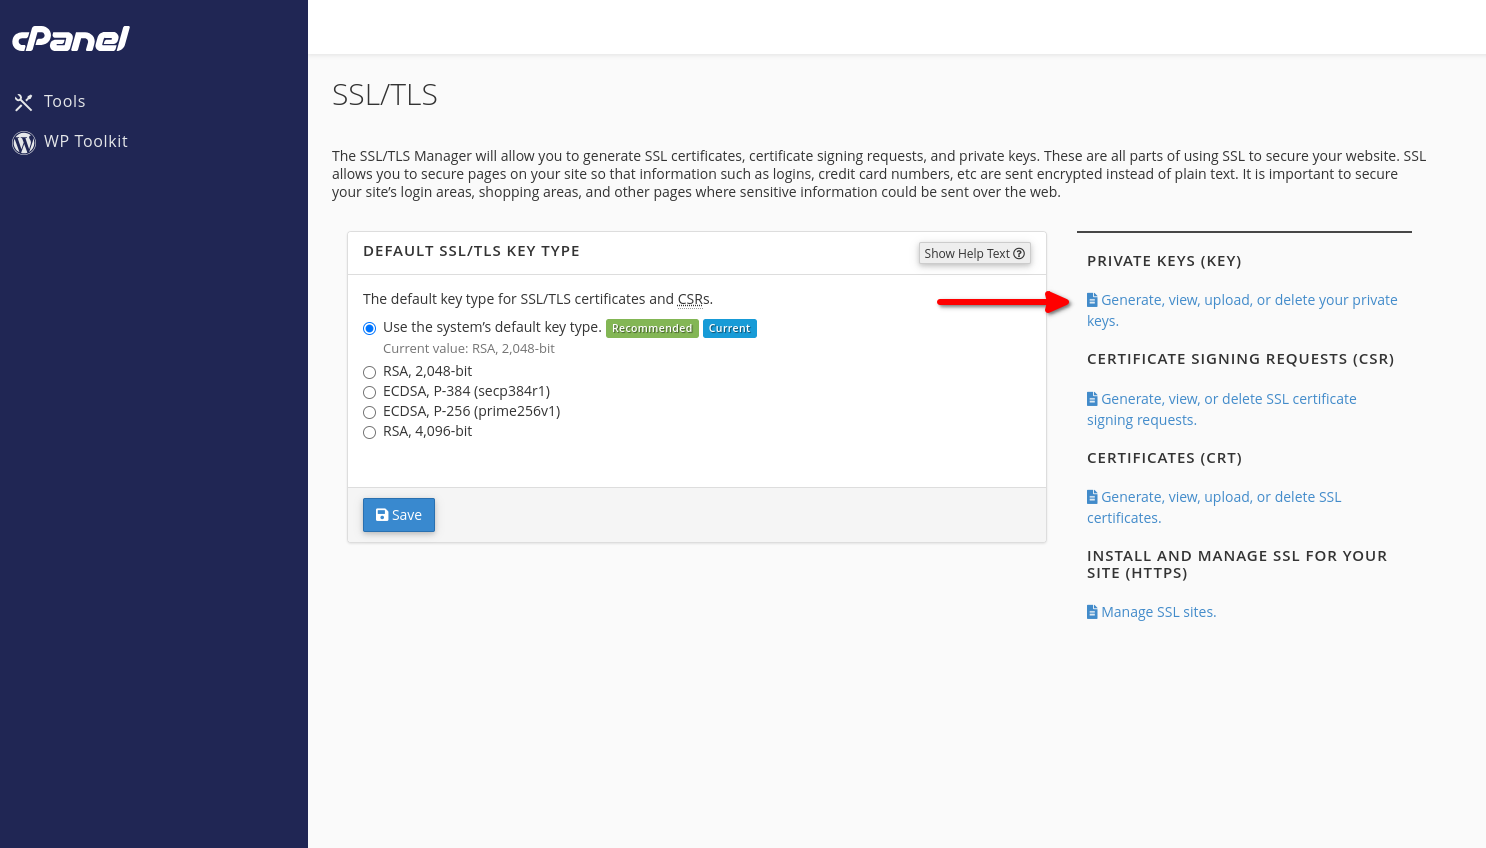
Under Private Keys (KEY), click Generate, view, upload, or delete your private keys.
-
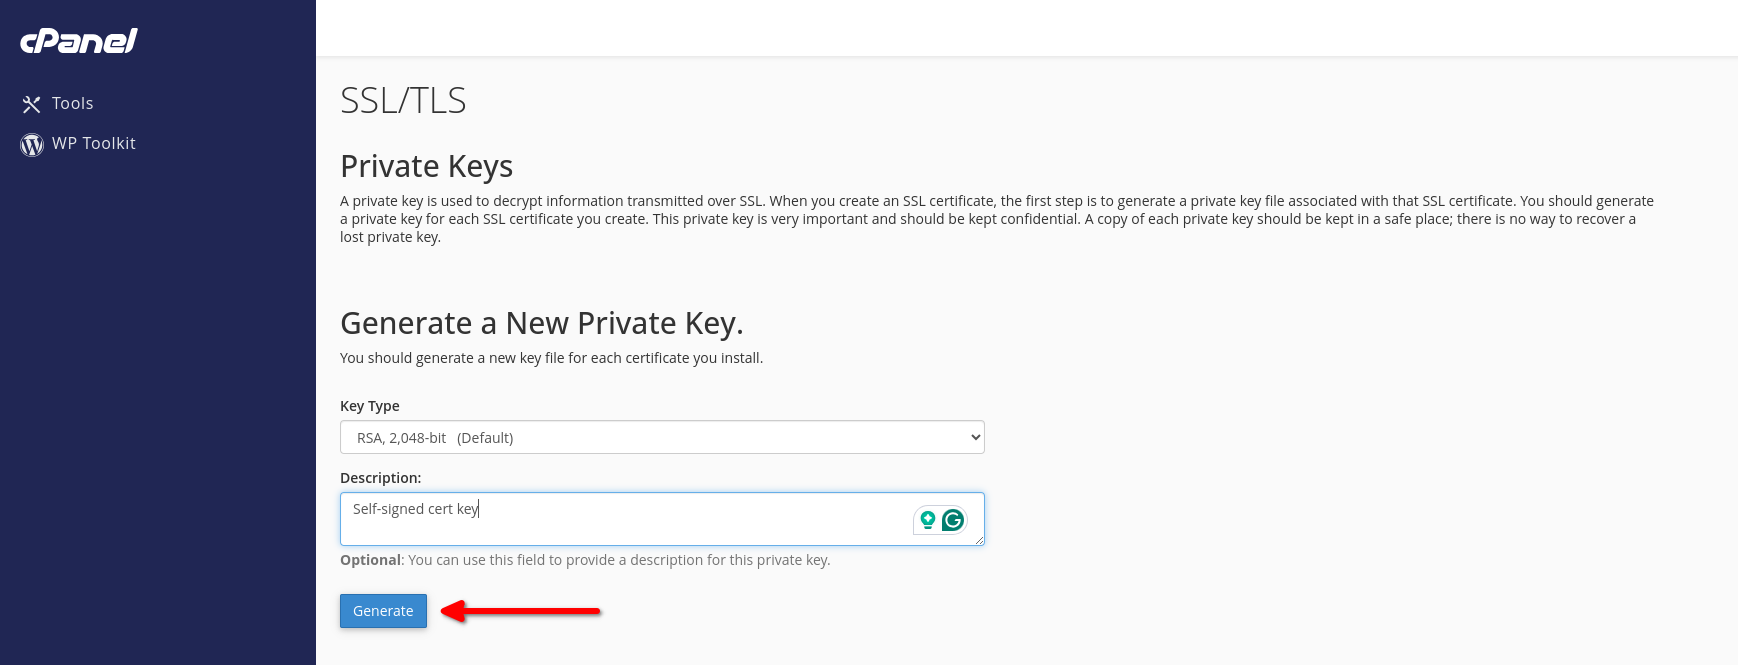
On the Generate a New Private Key page:
-
Ensure the Key Type is set to RSA, 2048-bit.
-
Enter a description, such as Self-signed cert key.
-
Click Generate.
-
Once the key is generated, click Return to SSL/TLS.
4. Generate a Self-Signed Certificate
-
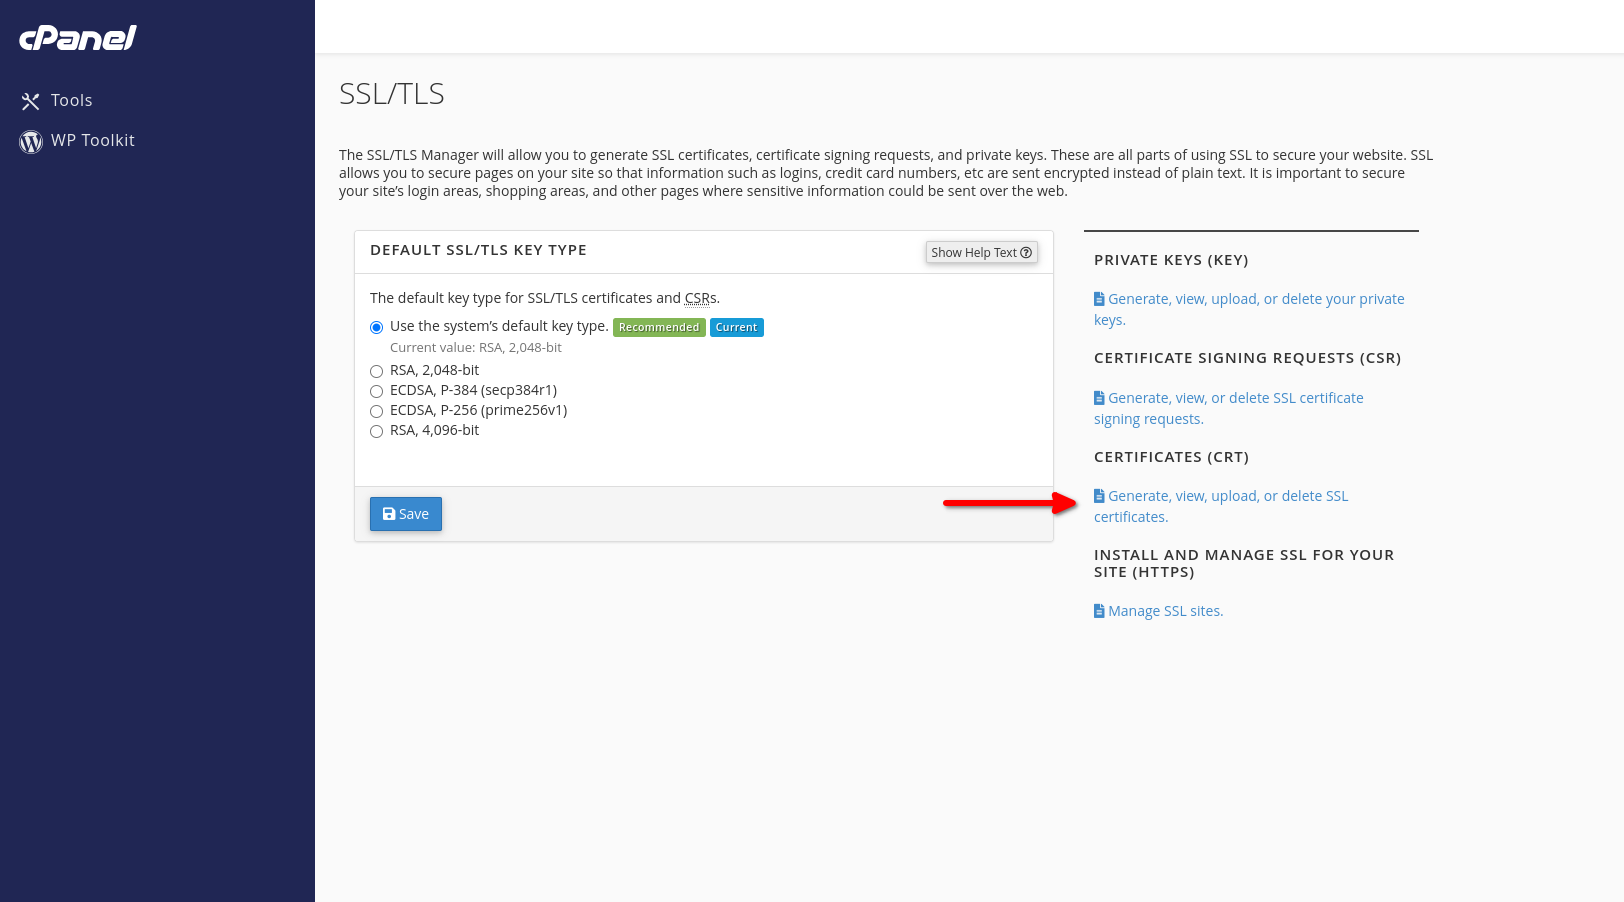
On the SSL/TLS page, under Certificates (CRT), click Generate, view, upload, or delete SSL certificates.
-
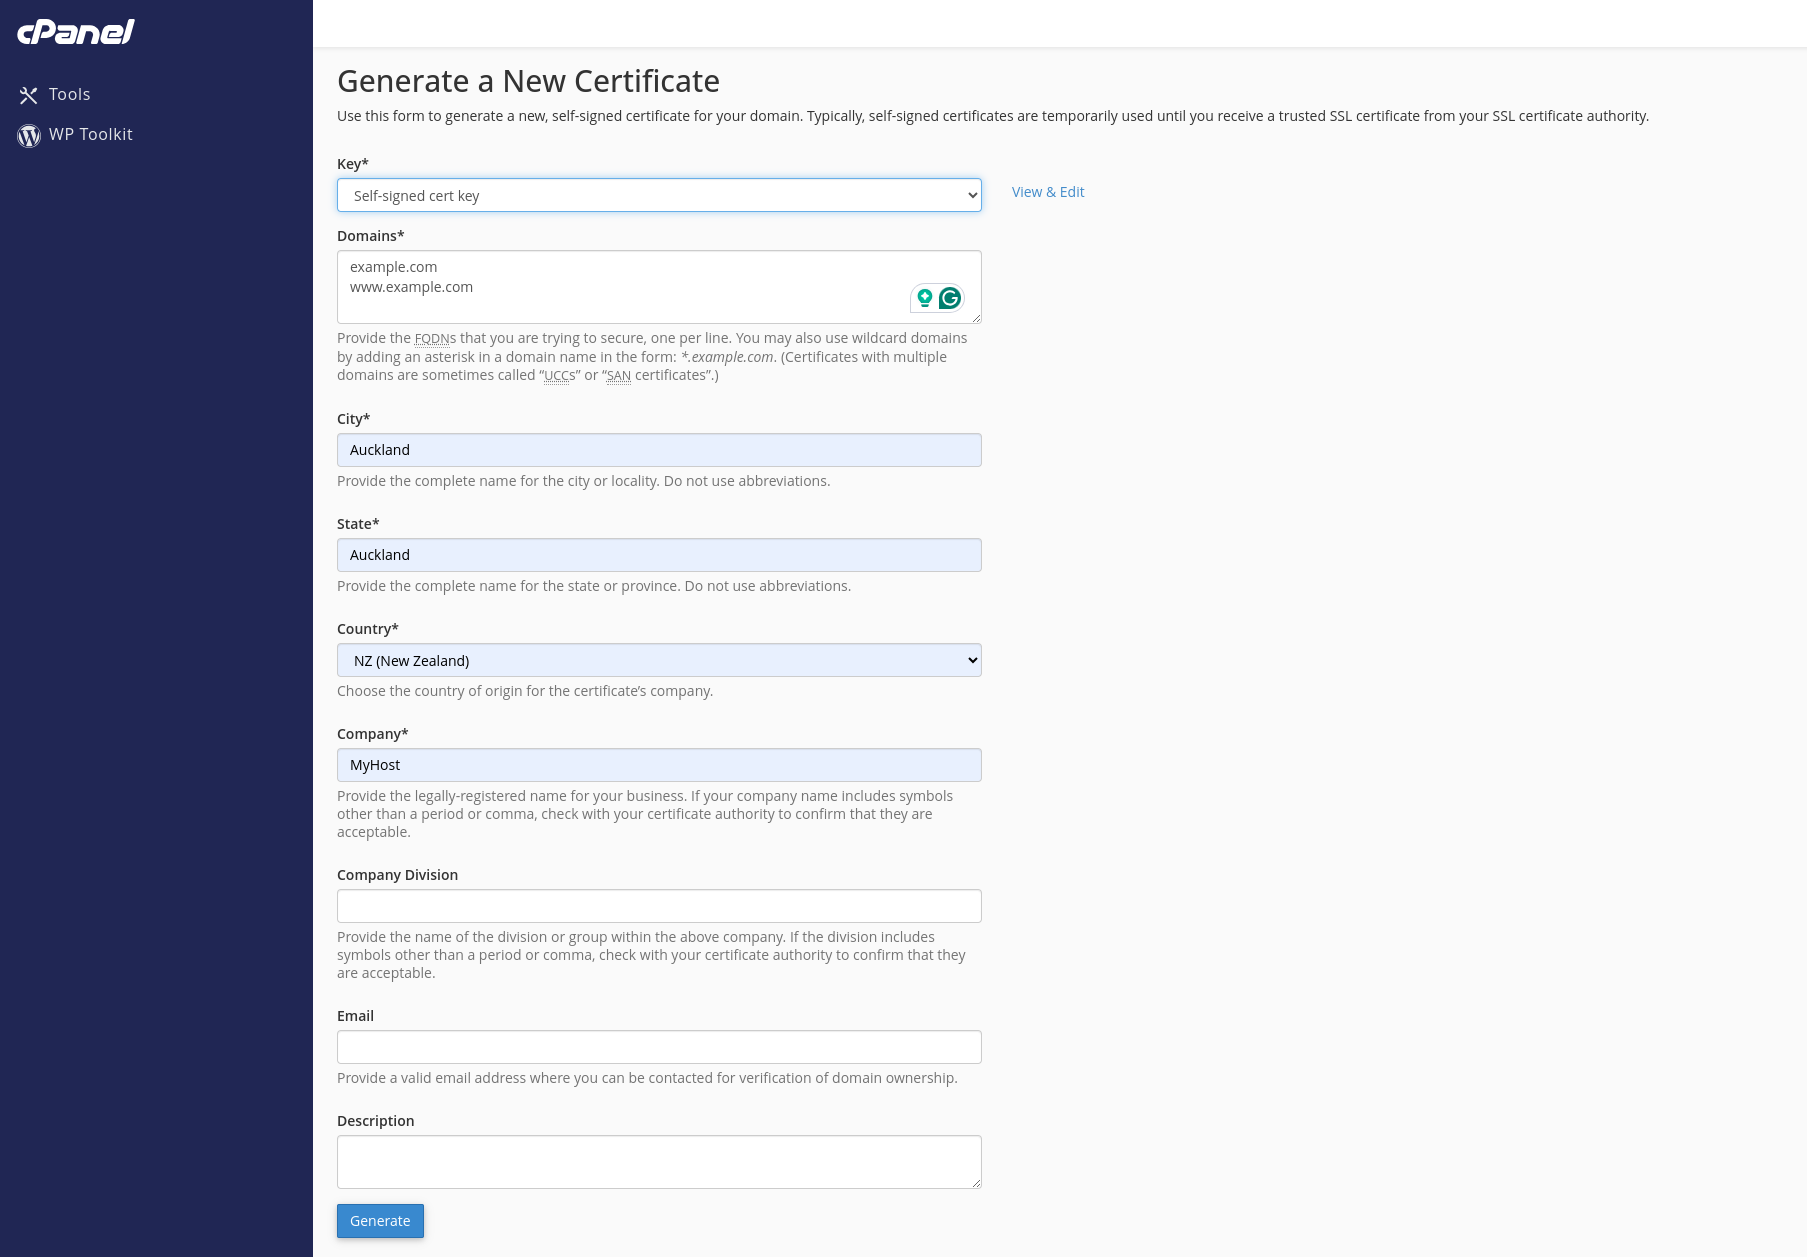
Under Generate a New Certificate:
-
Select the private key you created earlier from the Key dropdown.
-
Enter the domain name to secure (e.g., example.com).
-
Fill out the required certificate details, including the country code (e.g., NZ).
-
Click Generate.
-
Once the certificate is created, click Return to SSL/TLS.
5. Install the SSL Certificate
-
From the SSL/TLS page, under Install and Manage SSL for your site (HTTPS), click Manage SSL sites.
-
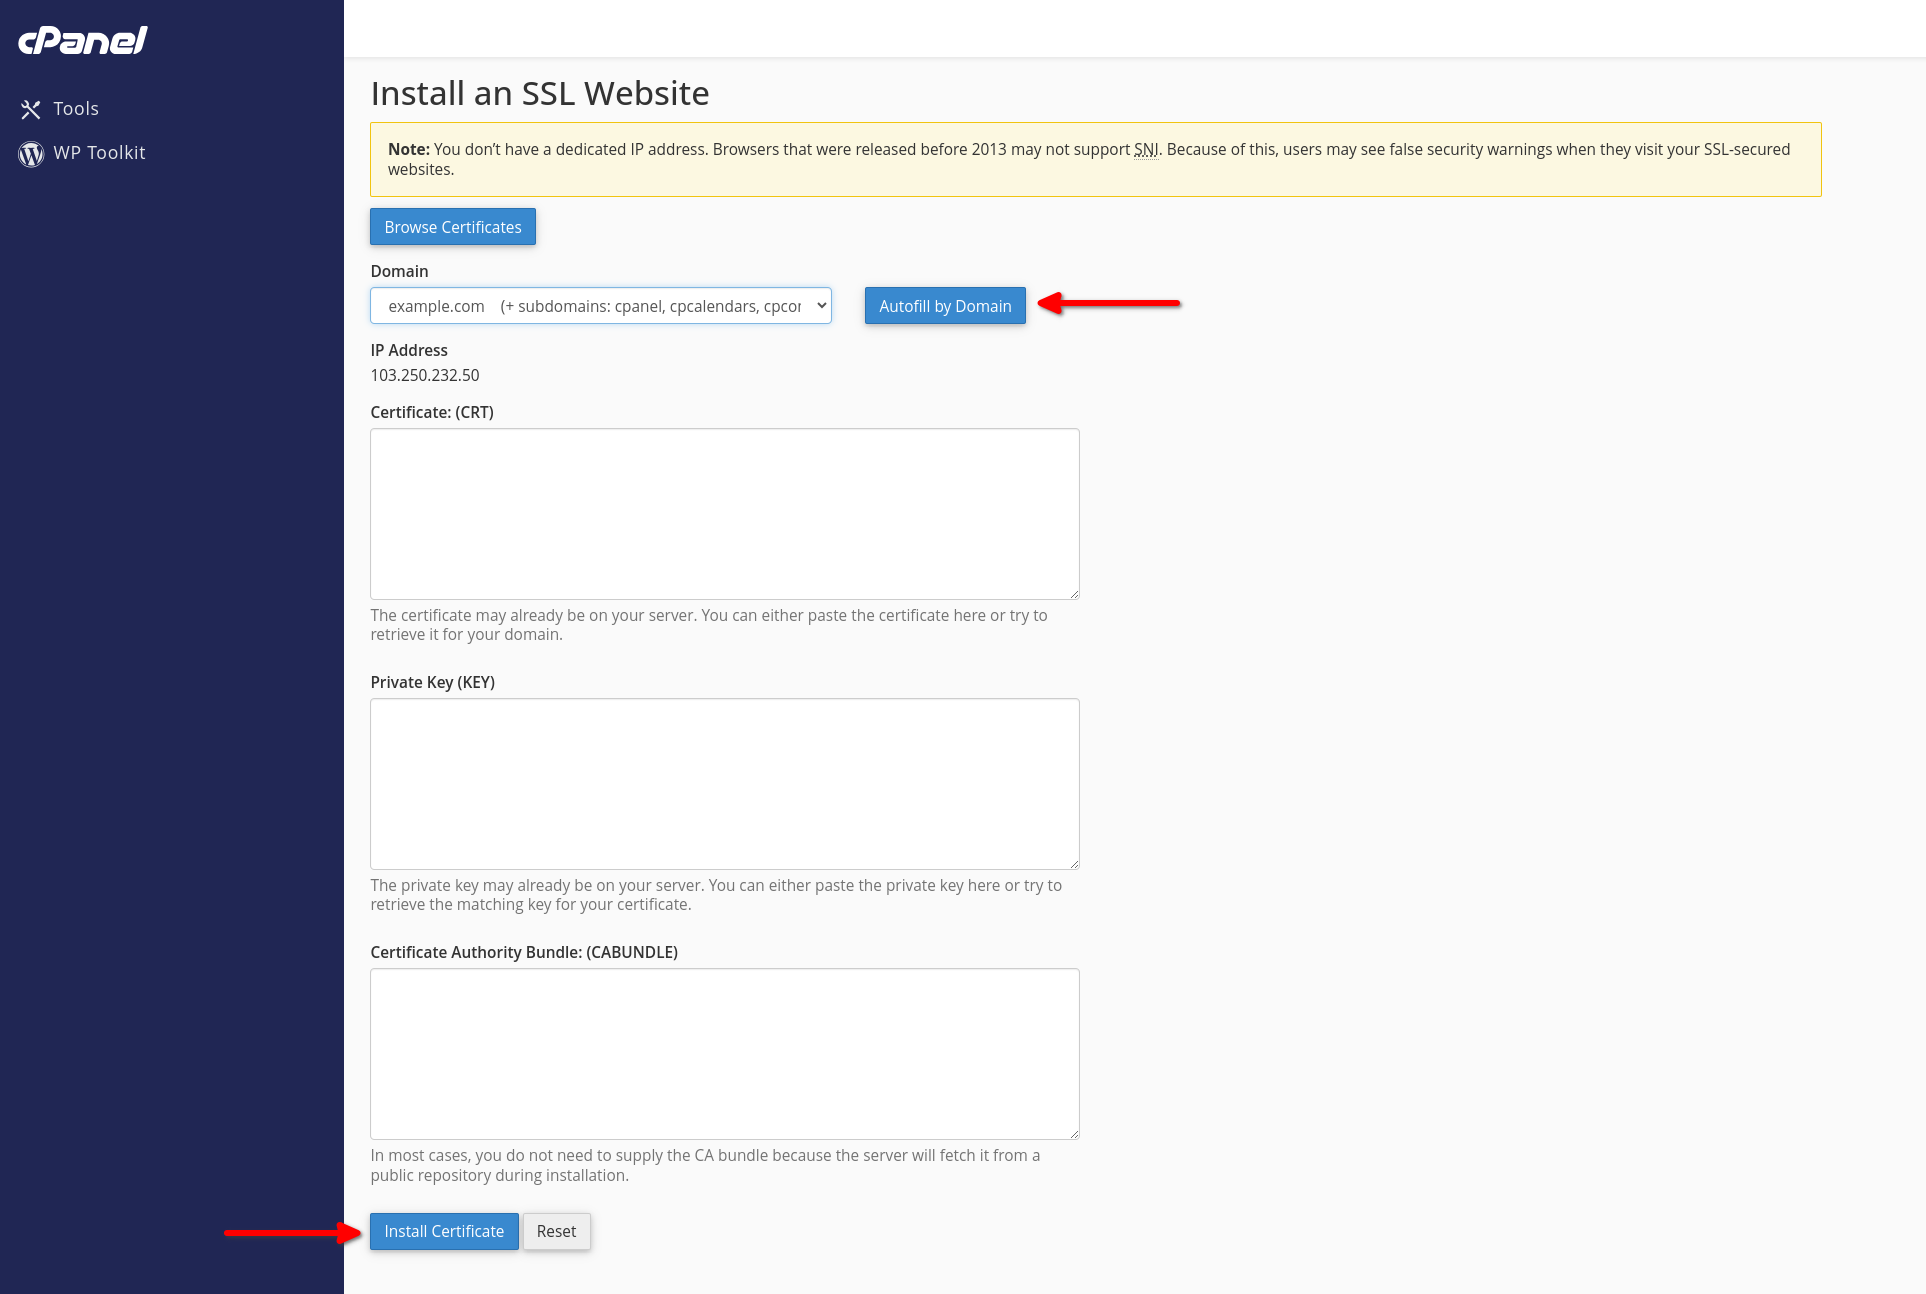
Under Install an SSL Website:
-
Click Browse Certificates and select the self-signed certificate you created.
-
Click Use Certificate to auto-fill the certificate and private key fields.
-
Leave the Certificate Authority Bundle (CABUNDLE) field blank (this is normal for self-signed certificates).
-
Choose the domain to secure from the Domain dropdown.
-
Click Install Certificate.
6. Confirm Installation
-
After installation, you will see a confirmation message stating that the SSL host was successfully installed.
-
Your site is now accessible via HTTPS, but visitors will see a browser warning about the self-signed certificate.
Additional Information
-
Self-signed certificates are not suitable for production environments due to browser warnings. For public-facing websites, consider using trusted SSL certificates, such as those provided by AutoSSL or purchased from a Certificate Authority.
-
Ensure your domain is pointing to the correct server IP before installing the certificate.
This process helps secure your development environment without additional costs while maintaining basic encryption for testing purposes.
